Showing posts with label Look What I Made. Show all posts

Saturday, December 22, 2012

widdle peoples

Hubby and I are in agreement that the Fisher Price Little People were the best part of our childhood. The Castle, the Service Station, the A Frame Cabin. Lots of houses, and accessories, every tiny little detail on these that made them fantastic.

Best was the little people themselves.  The Pigtail Girls. The Farmer and the School Teacher. When Hubby was a boy, they used to have wars with the peoples (as little boys are wont to do), and the "special forces" were always the Mean Boys - you know the ones: hats on backwards, freckled and scowling...

I've seen many incarnations of home-made "little people," even considered making some for Thing One's wedding cake topper. I did finally make some - for my mother. Let me introduce you to them, starting with:
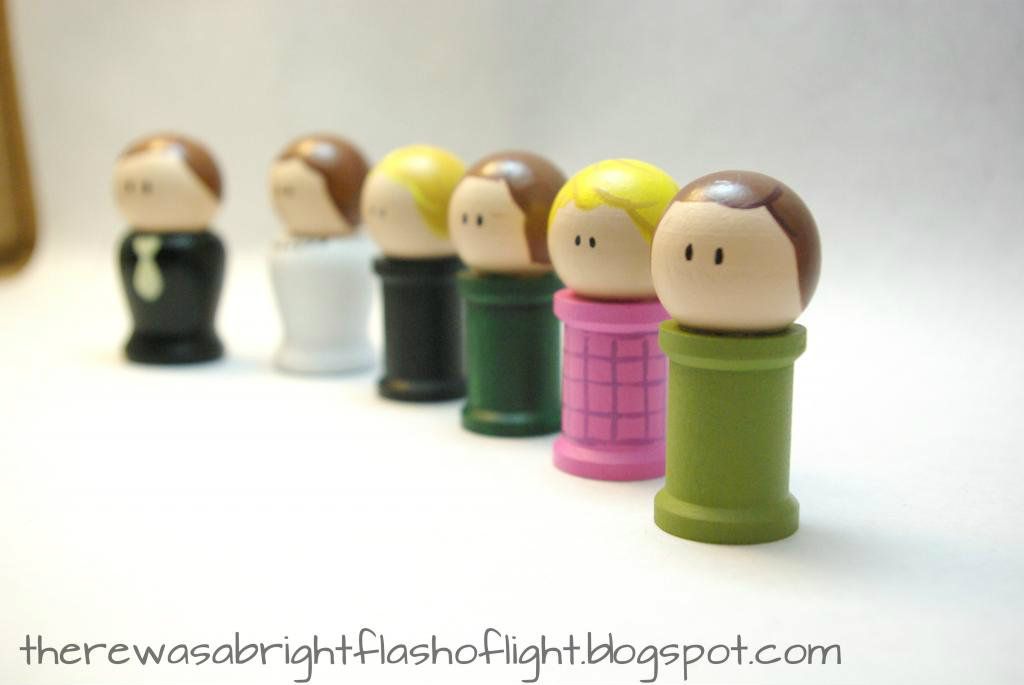

My youngest brother's family. They live in Connecticut, and we don't get to see them often enough. They need to move to Utah. Right now. My brother, there in the back, looks like he works for the mafia, but he doesn't. Really.

Next up, my younger sister:
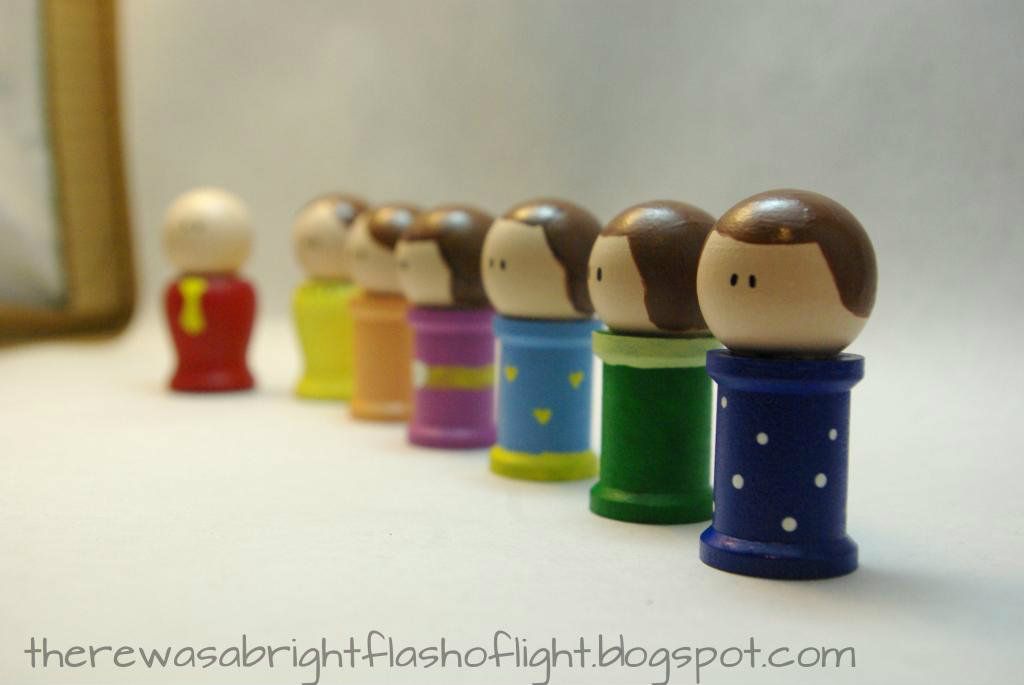

She married a fireman. So I painted him red. She's actually missing a people here, I didn't realize it at the time, but Lex rolled under the table and almost got lost... kinda like real life, actually. YOU try keeping track of number six when she's a bright and inquisitive FEARLESS child.

Then comes my fambly:
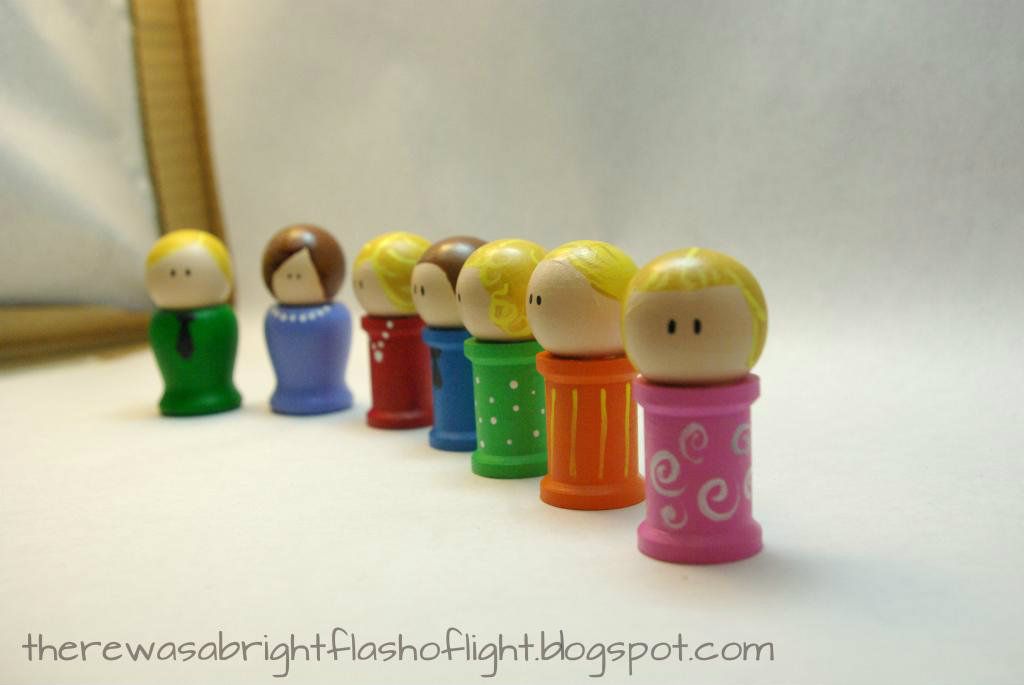

Hello kiddos!! Eclair looks cute and Hubby has hair!

Then the oldest, my sister Diva:
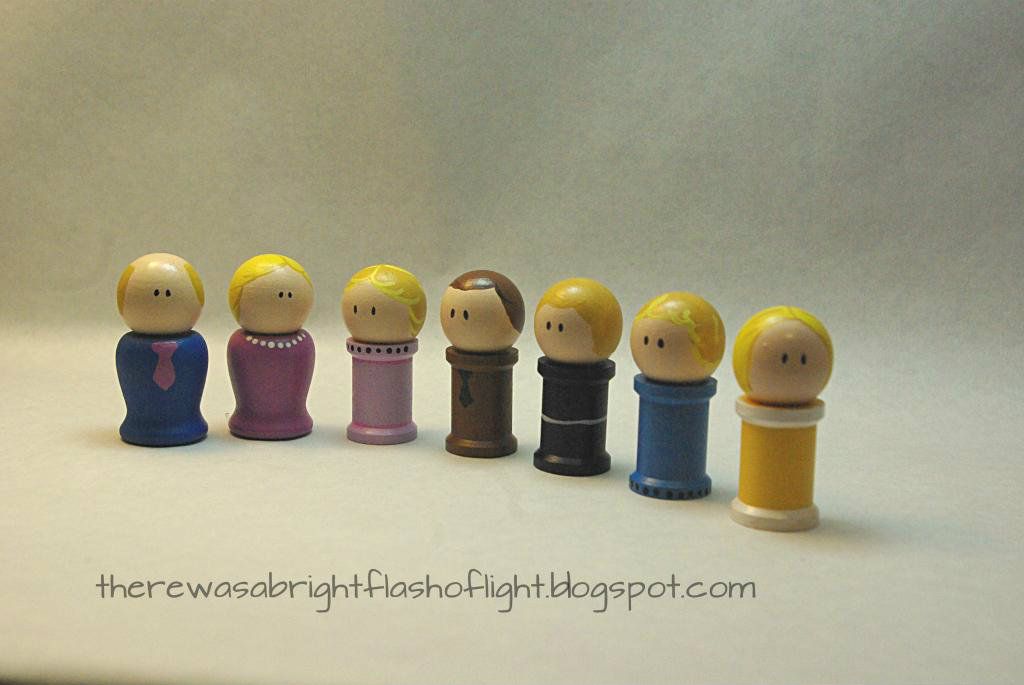


Her hubby is commonly referred to in the family as "that bald ripped guy..." so yeah, I let him be bald.

Now I have a new problem, an ongoing one. Diva has married off that pink one and the brown one. You might know them as Dorita and El Guapo. Younger sister Peggle has married off her Ellie-mae. And my own Thing One is now wed. So we need some more peoples. Don't forget that Dorita has given birth to Gabby and Pedro. My work will never be done.

These were really simple to do. All the wooden pieces came from Hobby Lobby, and they look like this:
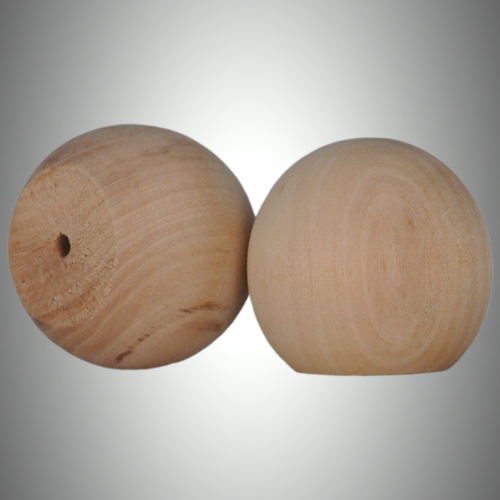


This is what I used for the heads, it's called a ball knob - it's flat on the bottom - this is important.

Adult bodies were candle cups:
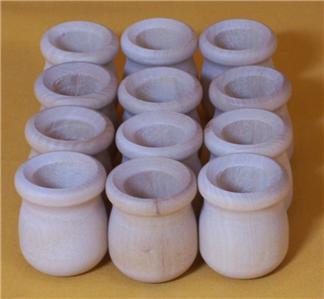

obviously, these are upside down like some clown wants to put candles in them or something equally stupid...

Kiddo bodies were made from spools:

Just put heads on bodies with Gorilla glue, wait 24 hrs so they're UNBREAKABLE... then paint! Be careful not to get glue on any part you are going to paint. Don't be sloppy....
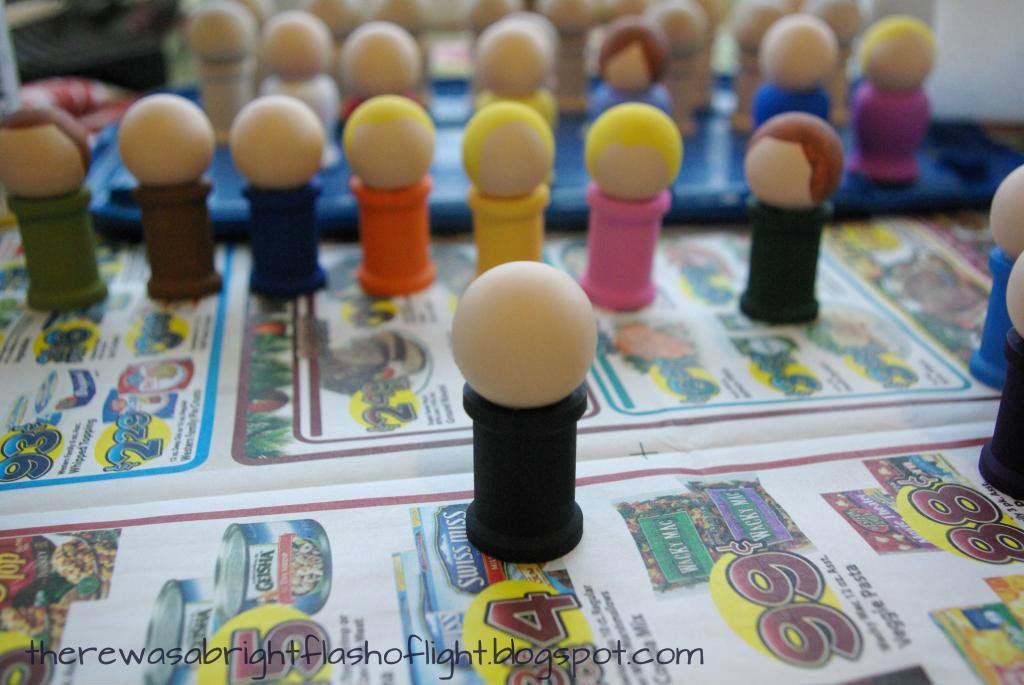

If I were to do anything different, I would have primed these puppies with spay paint primer before I started on all the hand painting, it would have gone much faster.

They make a wonderful Christmas gift - don't take much time, and don't take up a lot of space. Grandchildren LOVE them (Lex is always running off to play with my mom's set)
SO, GO!!! Gather supplies and make yerself a fambly!!!!

Jus' don' make 'em cuter than mine.....
.



Thursday, December 13, 2012

Whoovian shoes

When Screamapillar was in Prom court last year.....


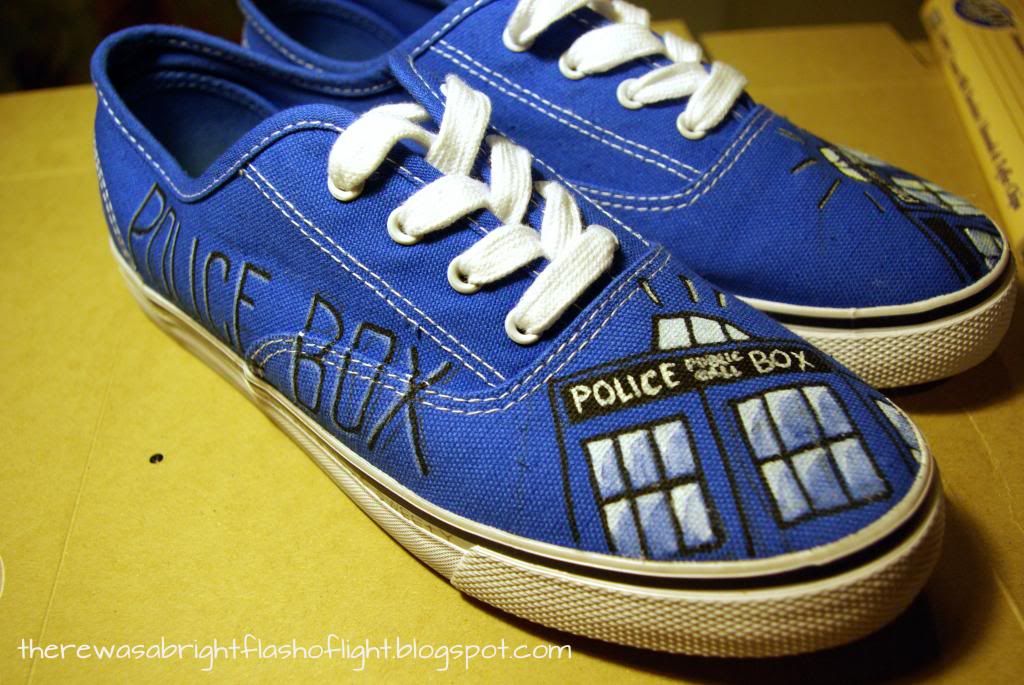
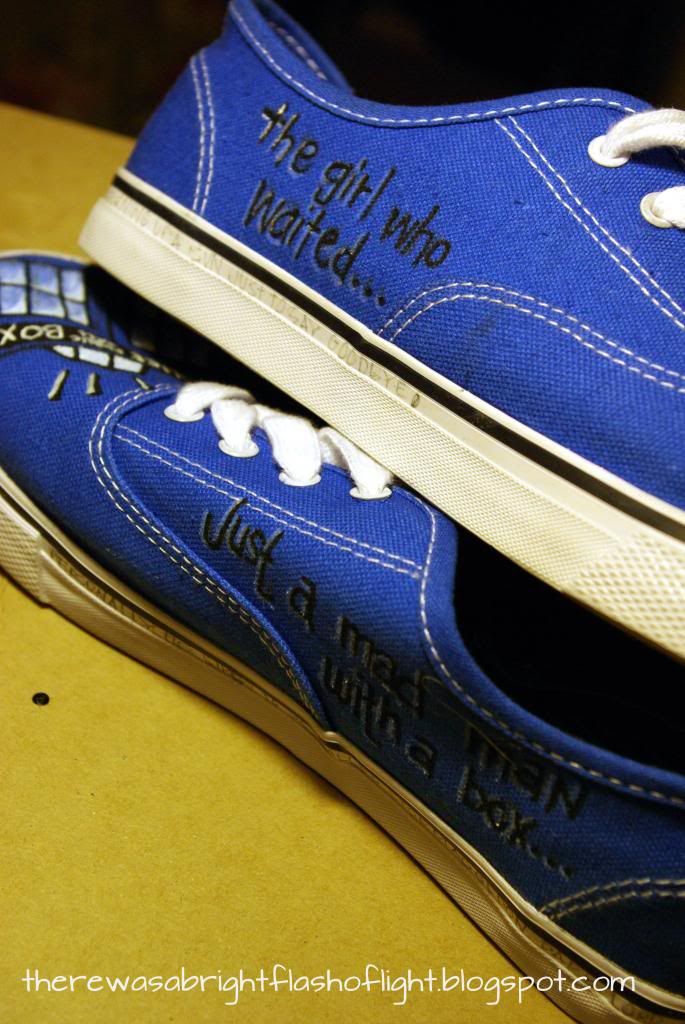
We made some awesome shoes for her to wear. We would have made the same shoes regardless of prom court, it was just a bonus that so many people got to enjoy them.

Nerdiness runs in the family, it cannot be helped.

The idea was Screamapillar's. The sketch was done by Thing One. The execution was done my Momma.


they are awesome from every angle


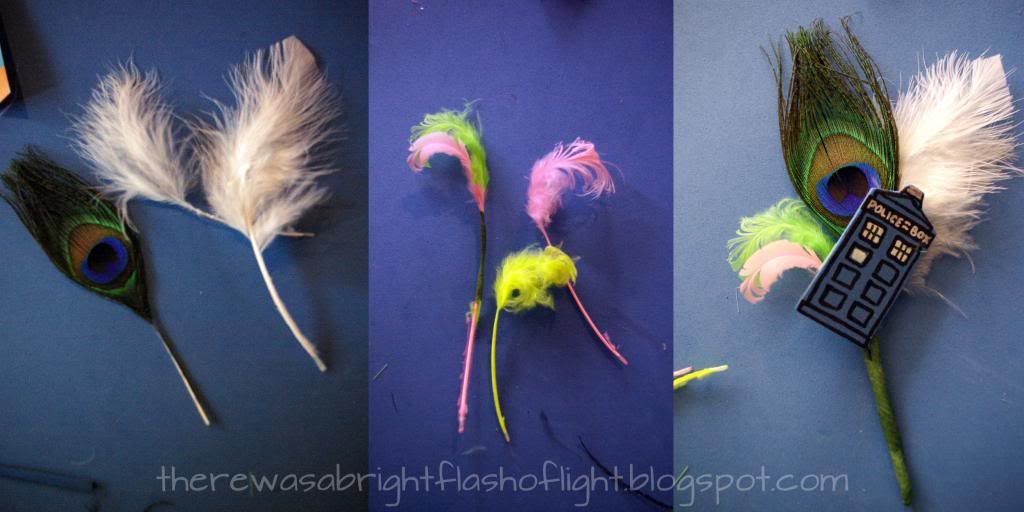
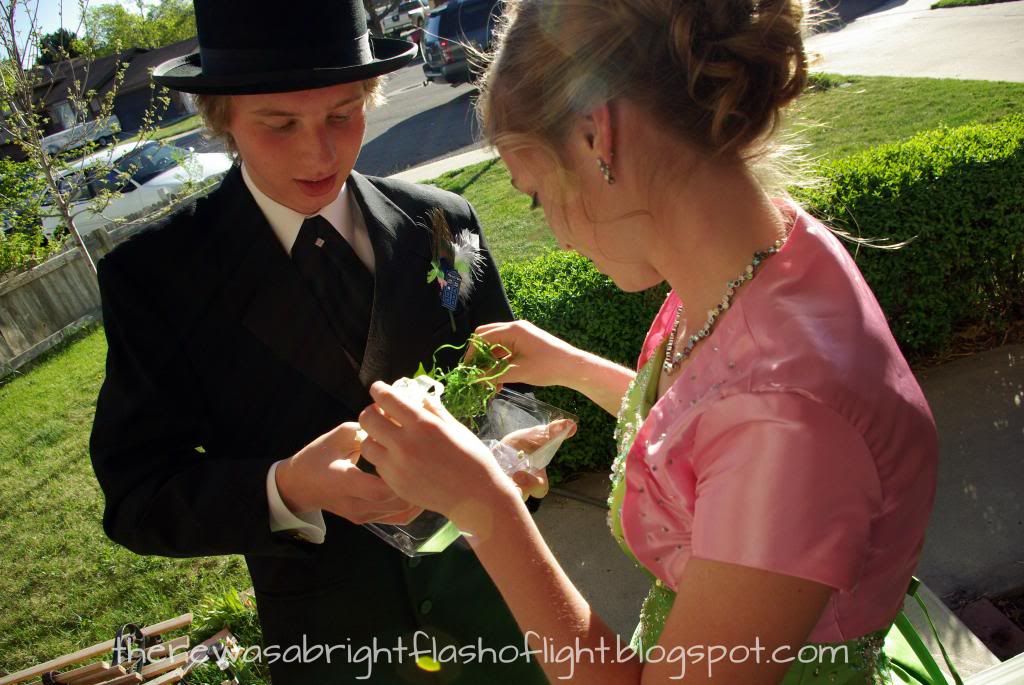
Thanks to Momma's mad skillz, her date's boutonniere looked pretty boss also. I used feathers...lots of feathers....


Here's the step by step: 
1. Use sharp scissors to trim away fluff from the spine of the feather, also trim for shaping.
2. for "curled" feathers shown at center above I trimmed the feathers into a very long an narrow shape, then open the scissors and draw the blade up the inside spine of the feather, much like curling gift-wrap ribbon. This may need to be repeated to get desired curl.
3. Wrap each feather with floral tape; put two together and wrap again, wrap each time you add a feather.
4. You could be finished here, or you could draw a TARDIS on some blue fun foam using paint markers and then hot glue it to the feathers......

But you have to have a very awesome date who would wear such a thing: 


So that's it. How to Who-ify your prom.


.


Saturday, October 6, 2012

the $49 dollar prom dress

This post is SO late. Screamapillar kindly reminded me the other day that I never posted about Prom last spring.

I doubted I would be able to top last year's $26 prom dress, and so far I haven't. This year's dress came from a bridal outlet (....where we may or may not have been looking for a big white dress for somebody else...). My little sister referred me to this place, and I must say I was quite impressed. They had a plethora of beautiful bridal gowns (an absolute plethora I say!), and probably twice as many formal dresses in every color of the rainbow.

I knew before we even got in the car what color dress we were going to come home in...even though we tried lots and lots of things like this:


and this:


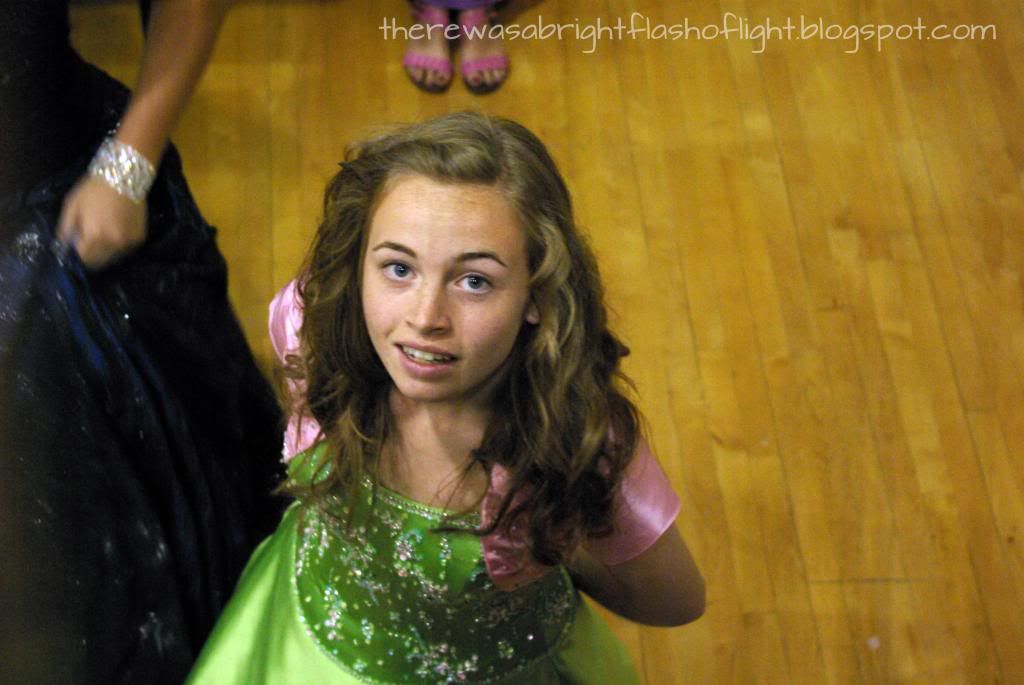
Looks like she didn't like this one much. Nice face, dere.

They were very pretty,  but didn't scream "SCREAMAPILLAR" at me...

This one did.


Toxic Lime Green.

The gown only had a halter type strap on top, so bolero time again. She chose pink for the bolero to match the ruffle at the hem, and did all the beading herself. The petticoats underneath are just a bridal petticoat with the top layer pinned up to expose the tulle. We did add one yard of gathered pink tulle over the white layers to add a little more pink (and we only attached it with SAFETY PINS!!!).

The original dress was also backless with just the corset strapping baring quite an expanse of flesh, so Mommy had to fix it some. I just pinned a piece of tissue paper to the back of the dress to create a pattern for the area I needed to fill. Cut two from matching fabric (that was the hard part, actually), sewed it together, turned it right side out, and hand stitched it down the right hand side of the dress back. I put in hooks on the left side to keep it in the right location, but the lacing pretty much held it in place.

Unfortunately, when laced up it looked kinda bunchy, but the bolero covered most of it so it didn't look too bad. At least she passed the dress code and didn't look scandalous....


At the end of the evening, she managed to accessorize with some stuff that didn't quite match:


YEA NOT PROM QUEEN!!! The sash for queen was white, and that would have just been too normal looking.....

Congratulations, Screamapillar, for winning 2nd attendant, you are so completely awesome.

And in case you didn't notice.....her date had a very unique boutoniere... but that (and her matching shoes) are fodder for another post...
.


Thursday, May 10, 2012

Ooh Sparkly

Soooo Mom has not posted the Prom post because she has apparently been feeling un-funny. So since she told me ages ago that my posts either have to be crafty or funny, here's a craft.


I had these red heels that I really liked, but they had those ugly wooden heels and platforms, so I didn't wear them often. Which is a pity, cuz I love peep-toe shoes. So I followed this tutorial to redo the shoe soles & heels with glitter. The result? IRON MAN SHOES. +1 Awesome Points.

I did another set as a guinea pig and have already been wearing them to see how they turned out. They were boring, so no pictures.  Some notes:

-Taping off the edges of the shoes really helped keep the glitter under control.
-it takes less of the modge podge and glitter than I had anticipated. I had lots left over.
-I used hairspray to seal the shoes. So far it's holding up pretty well.
-I did two pairs, one with just the modge podge glitter (not posted) and ones with both the MP and the sprinkled after glitter. The ones with the second coat of 'dry' glitter definitely popped a lot more, but the pair with the mixture was still very interesting looking, and might work for a more casual, subtle look
-After wearing the other pair (with just the MP glitter), I noticed that instead of just...rubbing off, the parts with modge podge kinda just got a sticky black. This could because I only used modge podge instead of doing a second 'dry,' coat, but I suspect it will eventually just wear off. If I were to do this again, I would keep it off the toe of the shoe and just do the arch and heel, like in this tutorial.

All in all, this was WAY simpler than I ever would have guessed.

Friday, February 10, 2012

Something sweet

Been getting a little crafty in anticipation of Valentine's day....back to making more earrings. I saw a cute craft on Modge Podge Rocks' blog, and tried to do it myself.


So very cute, but a little tricky.  Have you ever tried to drill a hole the size of a needle in a very small piece of candy while holding it in your hand? Not as easy as it might first appear.

Thank goodness for Dremel drill bits and a variable speed drill. You'll need two bags of conversation hearts for this, by the way. That way you can eat one bag while you attempt to drill holes in the other. The first four came out perfect, then I guess I got a little cocky thinkin' I had a handle on it and it was simple, so I tried to go a bit faster.

Don't do it. Go slow and steady, not too much pressure. Otherwise you have a pile of broken conversation hearts instead of nicely drilled ones.

Had to change her instructions a bit though. Couldn't use the Modge Podge because it erased the food coloring "ink" and the words disappeared altogether. SO...I did what any insane person would do to an edible item they would like to wear, and I sprayed them with clear spray paint instead.

THESE ARE NO LONGER EDIBLE! 
While Modge Podge isn't anywhere on my menu, it is non-toxic. Spray paint cannot possibly be good for you, so don't let little people eat these, please.


And then, as I'm sitting there slowly drilling tiny holes into these little hearts, it starts to occur to me: man, these messages are pretty lame. Seriously lame. If I were in charge they would have MUCH more exciting messages, like: 
"You're the most wonderful person I've ever known!"
"Send the writer of this blog $1000!"
"You should be eating chocolate instead!"
Or my favorite:
"Your pants are on fire!"


AND THEN I HAD AN IDEA........

There have been murmurings in my house about a certain couple....comments overheard.....Pinterest boards containing WAY too many pins hinting at a summer wedding.....


Yeah. Those two on the left. Her on the right? I have no hope. Let's just say that EVERYONE in the family has been instructed to be VERY VERY nice to any boy who seems to be interested in her so that someday we can find a gullible husband for her...

But those two on the left, they need to get in gear and make it official so I can start making some REAL plans instead of just imaginary Pinterest ones. To speed the process along, I made  thing one her OWN VERY SPECIAL PAIR OF VALENTINE'S EARRINGS!!!


YAY!!! BIG enough hint, Boyfriend? (does he even read this blog?) And then Thing One refused to wear them. She likes Boyfriend too much to scare him off, I think.

But it's okay, One of the awesome girls at work snatched them right up, apparently she has a plan of her own that they might assist in implementing...

Anyway! I've made up tons of these for Screamapillar to sell to her little friends to assist in her continuing quest to pay for choir tour. If you'd be interested in a pair, send me a FB note.


I'll keep you posted on any pending announcements...........hopefully soon.
.


Friday, December 23, 2011

wee little houses

YEA CAMI! She correctly named the style of house in our photo:


These little houses are from a project I did for my parents for Christmas a few years ago. I made about half of the many homes they have lived in since they were married. The little silver one is a quanset hut was their first home, on a military base in California when my dad was in the Navy.

The project was pretty time intensive, I made all the houses from empty cereal box cardboard. Except for the little one there, that's a paper tube instead. They're really just a series of boxes glued together with  peaky little roofs added.

 The really fun part was trying to work past the picture of the house from my memory as a child to what it actually looked like in real life (Google Earth helped a bit, for the houses that are still there today). The houses above are from Camarillo, Poway, and two from San Diego. The large one below is my grandmother's house, where we lived briefly between orders, the other one and half that are visible are from Albuquerque.


Mom puts them out under the Christmas tree every year, and I need to work on finishing them up. I think there are still another twelve to go before I'm done....

I recently came upon a site that has some great patterns for making your own houses. I'd give you mine, but they were completly custom and since I kept wingin' it, my patterns aren't much good to anyone beyond myself.

http://www.bigindoortrains.com/primer/glitterhouses/small_glitterhouse/beginning_glitterhouse.htm

Looking back at these houses, I really think they need some more "bling." Perhaps it's time for a remodel.
.

Wednesday, August 3, 2011

How to properly measure stairs

It's time once again for a tutorial. Much needed information that I, the expert in all things, will share with you lowly plebian life forms.

This tutorial is born of a project I have been planning. You see, I have some ugly stairs. They have cheap carpet that desperatly needs replacing. Here's what I have in mind:


http://loftandcottage.blogspot.com/2011/06/diy-nailhead-stair-runner.html


Lovely, isn't it? In order to accomplish this, I have to complete the following steps:

1. Rip out the old carpeting

2. Repair any existing damage to steps and risers

3. Paint and/or stain

4. Measure rise and run to determine the amount of runner carpet to install.

5. (Buncha more steps to install carpet that I may discuss in a further tutorial. Today, we measure.)


There a number of ways to accomplish step 4. Most involve complex calculations with the rise and run, number of steps, etc.

The way I'm going to demonstrate is SO much easier!!

Here's what you need:

Pencil

Paper

Measuring tape

Teenager with at least four limbs.


HERE'S HOW IT'S DONE:


TAAA DAAAAAA!!

Thank you for tuning in for today's tutorial!

And a special thanks to Screamapillar for the use of her limbs.
.


Tuesday, April 19, 2011

Spring Wreath

Usually spring is about spring cleaning. But I have come to the sad realization that cleaning my house is pointless and futile. It will never be clean until my kids all move out.

So instead, I will make silly crafts.

I made this a few weeks ago, but couldn't bear to put it up until spring had really arrived...my tulips have finally bloomed, so I think it's time.


And there it is. My grassy spring wreath. It's pretty easy to make, all you need is some of that "fun fur" yarn and this very detailed diagram tutorial:


Wait -- wrong detail. Let's try this one:


Crap. That's not it either. So just do this intead: Buy green extruded wreath (I found mine at Joann's). Buy Lion brand Fun Fur yarn, in green if you like green grass (I found mine at Hobby Lobby). Wrap yarn around wreath for about 5 hours. Add flowers using straight pins (I painted the heads pink to match the flower centers because I'm OCD like that).

And if you're weird, like us, your grass needs bugs:


Thing Two pointed out that this looks like I skinned Oscar the Grouch and used his pelt to hang on the front door. Thanks for that lovely observation, my son. Next time you spend five hours on a semi-pointless craft I'll find a suitable inappropriate comment for you.
.

Friday, February 4, 2011

Faux vintage glass

 I'm getting stir crazy and anxious for spring! One day as I was wandering the internet in search of  lovliness, I came across this at Craftberry Bush:


See those pretty jars there? Underneath those lovely flowers? I have a couple like those, very expensive Mason jars in antique blue. I live in fear that one of my children will decide to play broom hockey with one and destroy it (because they're destructive like that sometimes...).


Take a closer look at the photo: those are NOT ALL MASON JARS. I investigated. Sure enough, that talented girl Lucy at Craftberry Bush has been making faux vintage glass. But she has no tutorial. So I searched hither and yon and discovered how it's done at Bridal Buzz. And that tutorial is fantastic, made me all brave like I got skillz or something.

You need glass jars, a fan brush, and Vitrea 160 paint and thinner (which I hunted high and low for, went to 5 different places and only found at Michaels). I used turquoise, but have seen similar amazing results on YouTube using other colors. Apparenlty I am the last person to discover this, because while Michaels had 72 jars of every other color, I got the last turquoise.
Look what I made:


 They are far from perfect, and have way too many brush marks, but hey! I made a pretty! I used pickle jars, and mason jars, and applesauce jars, and a couple vases.....you get the picture.


So click HERE for the wonderful tutorial, and if you need to borrow my paint, let me know (I estimate that the one jar of paint would make up 47 gajillion glass jars).

Oh! I forgot to tell you where I got the lovely roses in by big blue vase!


My little friend is getting married and we did a bridal photo session. I offered to bring a "dummy" bouquet, and put it in that vase just for you. Congratulations ReBarka! ( I so love messing with people's names! She reads this blog and will be suitably horrified by my misuse of her name.)
.

Friday, January 28, 2011

Where did all the colors go?

January is horrible. It's winter and everything outside is white and encased in snow and/or ice. The Christmas decor has come down, and there is no color to be seen anywhere. And don't forget that it is very cold. Quite depressing.

It kind of gets dangerous to live with me around this time every year. I start getting ideas. For renovations. And painting. And redecorating and crafts. And sewing. And future gardening. And if you live in my house and are in danger of becoming a slave to my whims, now is the time to go hide under your bed.

Here's what is potentially on tap:

Entry way renovation: we need solutions, people. More coathooks (or less coats). Someplace for boots and shoes that is far more attractive than the "rustic" shelf currently in use. Replace the hideous and vile wooden parquet flooring with easy to clean ceramic tile. My front door in unforgiveably repugnant and in need of painting. Repairs to a couple small holes in the walls made by a teenage boy who doesn't understand physics as it relates to drywall and knowing your own strength.

Upstairs bathroom: re-priming doors and cabinets and repainting. I refuse to give up my bathroom crab, so while a slight change in color is likely, change in decor is out of the question. If I can find a jetted jacuzzi tub for under $100 I might consider that upgrade....pretty (un)likely right?

My bedroom: re-paint, re-curtain, re-quilt. The only thing that's staying is the husband.

In order to avoid poor choices in paint color in my desperation to enliven my drab existence, I will seek chromatic comfort in my crafts and sewing.
And there are a few new things I would like to try:

I've already started on these lovely faux vintage glass jars, but haven't quite finished yet:

I've seen these in a few places out there on the web, but Kristen's easy tutorial at Bridal Buzz is a good one. Let's hope mine finish up as good as hers, I'll be baking them tonite.

And these faux chenille blankets look adorable and very soft, I'd like to try this also:


This was made by Anneliese at Aesthetic Nest, you should check it out. I must warn you not to start this unless you are willing to sacrifice a significant amount of time to the project, it's a killer.

There are many more possible projects like, fix the fence, repaint the deck, move and rebuild the planting boxes, fix up the "doll house" in the backyard, rip out the stair carpet and paint them instead, plant the vegetable garden, weed the firepit, fix the swingset, repaint my kitchen hutch, paint the shutters, make new curtains, repaint the kitchen cabinets, tote that barge and lift that bale.

Now. The real question. Will this procrastinating lazy blogger actually accomplish anything? You'll be the first to know (well, first after the children/slaves who will very soon be dragged kicking and screaming out from under thier respective beds....).
.

Wednesday, December 8, 2010

Easier than it looks

A few years ago at a craft fair I saw the most amazing thing.
So I bought it. It was so shiny and beautiful!!!
And now I have attempted to make my own.

They aren't as perfect as the one I bought, but I did my best.


Look! There's me! My reflection in the shiny silver ball! Hi, Me!

I bought the 12 pack of glass bulbs at the dollar store, for (surprise!) a buck. The paint and other materials I already had on hand. I just used regular white craft paint, which was fine even for the silver ball. You could use whatever color you want (but I like white, be a sheep - use white). I only took off the lid and used the paint that was on the inside of the lid. Very little paint required. And no messy cleanup if you follow my example.

Here's the trick:

No paintbrushes needed. Just a pencil eraser with a straight pin stuck in. If you can't manage to stick the pin in the eraser without drawing blood, walk away now. I'll make one for you and you can pick it up at my house. The green ball was my practice ball, it took a bit of time to perfect the technique. If you make a mistake, just wipe it off quickly with a wet paper towel.

Remove the hanger from the bulb, and slip it over a pencil. Wipe it down with a clean cloth to remove your grubby fingerprints. Then do yer painting, and put the pencil into a cup to dry. Easy as pie.

See? Any idiot can do this. I did.

The real skill is in not getting paint on your clothes because you're a klutz (me) and trying to come up with a suitable design that doesn't suck. YOU CAN DO IT!!! I KNOW YOU CAN!!!

Go forth, and paint.


Wednesday, October 27, 2010

EEEEKKKK!!!

NO TIME FOR BLOGGING! ON A DEADLINE!
WARD HALLOWEEN PARTY TONITE!
6 COSTUMES UNFINISHED!!

So, I cheat. Here is the most adorable child I own, wearing one of my all time favorite costumes:


Please disregard that the dates on the photos are inaccurate. It really was 2003, not 2002. Eclair didn't walk until 2003 when she was two. Isn't she ADORABLE!!!!!!

Gotta go -- must finish costumes!

Don't have any idea yet what I am going to wear...
.

Monday, October 25, 2010

I didn't mean to lie....

I MEANT TO POST THIS MORNING! REALLY I DID! I CAN'T DO IT! I CAN'T POST EVERY DAY!!!

Because stuff like this:

happens. And some days I don't get anywhere near my computer.
At top, big trunk pulled out of the ground, and four pieces of the tree that smashed one panel of fence over and shifted another 3 feet off it's post (and broke the post, of course).

There is the biggest part of the tree that has been dragged back into our yard. As you can see in the top photo, it narrowly missed hitting the neighbor's house. It was such a LOVELY torrential downpour and thunderstorm last night. With a side order of WIND. 


And the power went out while I was writing what was supposed to be today's post. So here I am posting too late in the day again.

And it's Bonnie's birthday today. I posted four You Tube videos on her FB page just to be annoying, and I must mention it here as well:
HAPPY BIRTHDAY BONNIE!!!!!


On to today's late post.

As you could see from last night's sneak preview, we made an amazing spiderweb yesterday. I wasn't my idea, it was Erin at  Crafts and Sutch . Very, very clever.


It was quite simple, really. Pushpins around the outer edges, a large nail in the center. Start by tying your black yarn to the nail, and loop back and forth from push pin to nail until you have a web. Then, starting from the center, string the spiral, wrapping once around each of the "spokes," gradually increasing the distance between each spiral. Very, very cool. Erin does a very detailed tutorial at her blog, click the link above if you'd like to check that out.  This is on a pretty big wall, and I wish we had done it earlier so we could enjoy it longer.

And Eclair made inhabitants for the epic spiderweb.

Materials needed:
Black pipe cleaners (or as the packaging says "fuzzy sticks" 
because apparently it is politically incorrect to clean pipes anymore)
Google eyes & glue
Person with short legs and little crafting skills

 Start with four pipe cleaners if you want your spiders to have eight legs. For mutant spiders, use however many you would like. Holding all four together, bend them in half. You must make the face below while bending.
 Take the loopy part at the top, and twist it a couple times.
 Here's what it should look like at this point:
 Bend your spiders legs to make a knee and an ankle.
Glue on google eyes and give them a name. 
We made the baby spider by cutting two pipe cleaners in half and starting with four shorter pieces.

Add spiders to spiderweb. Enjoy.


Now here's the funny part: Eclair put one of her spiders on Hubby's leg while he was watching tv and not paying attention. When Hubby finally noticed, he screamed. It was wonderful.
.